Wednesday, 12 August 2015

Barney the Bakers' Boy

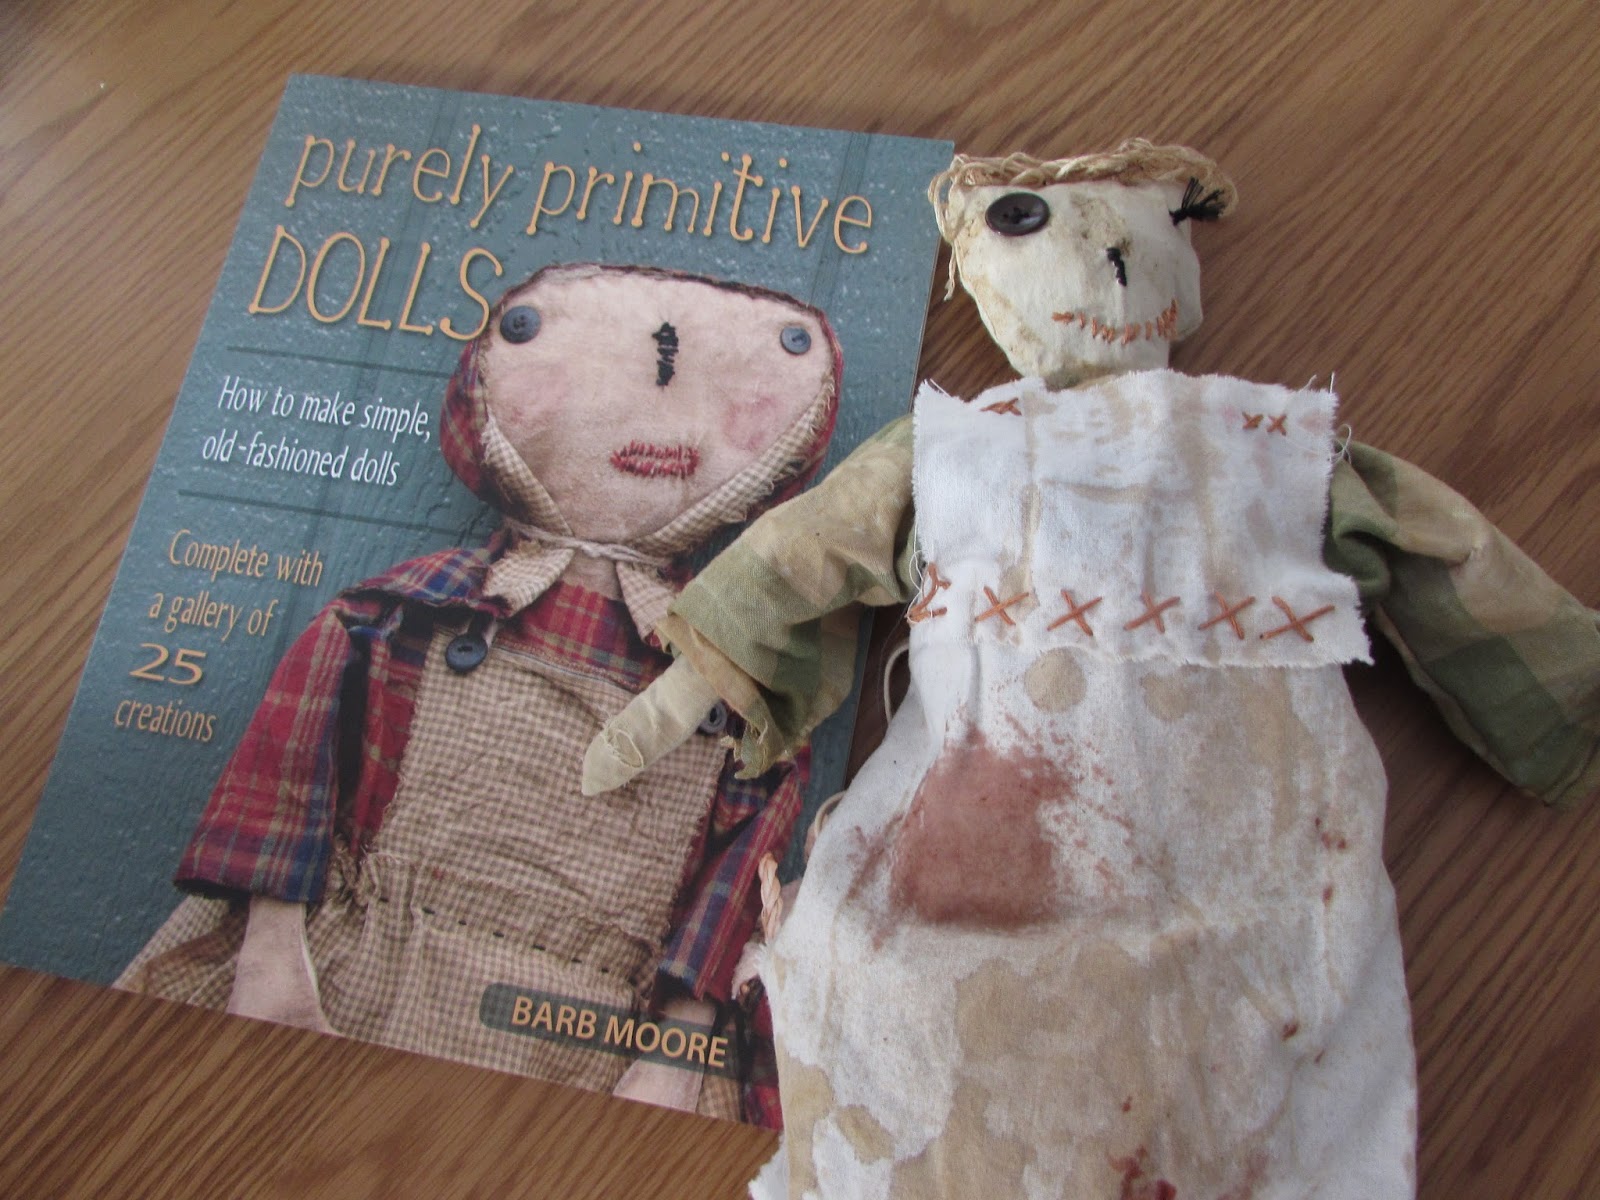
For my birthday, mum bought me a gorgeous book called "Purely Primitive Dolls" by artist Barb Moore. In it, she describes techniques and designs for making one-of-a-kind primitive dolls out of old, preloved fabrics and materials. 


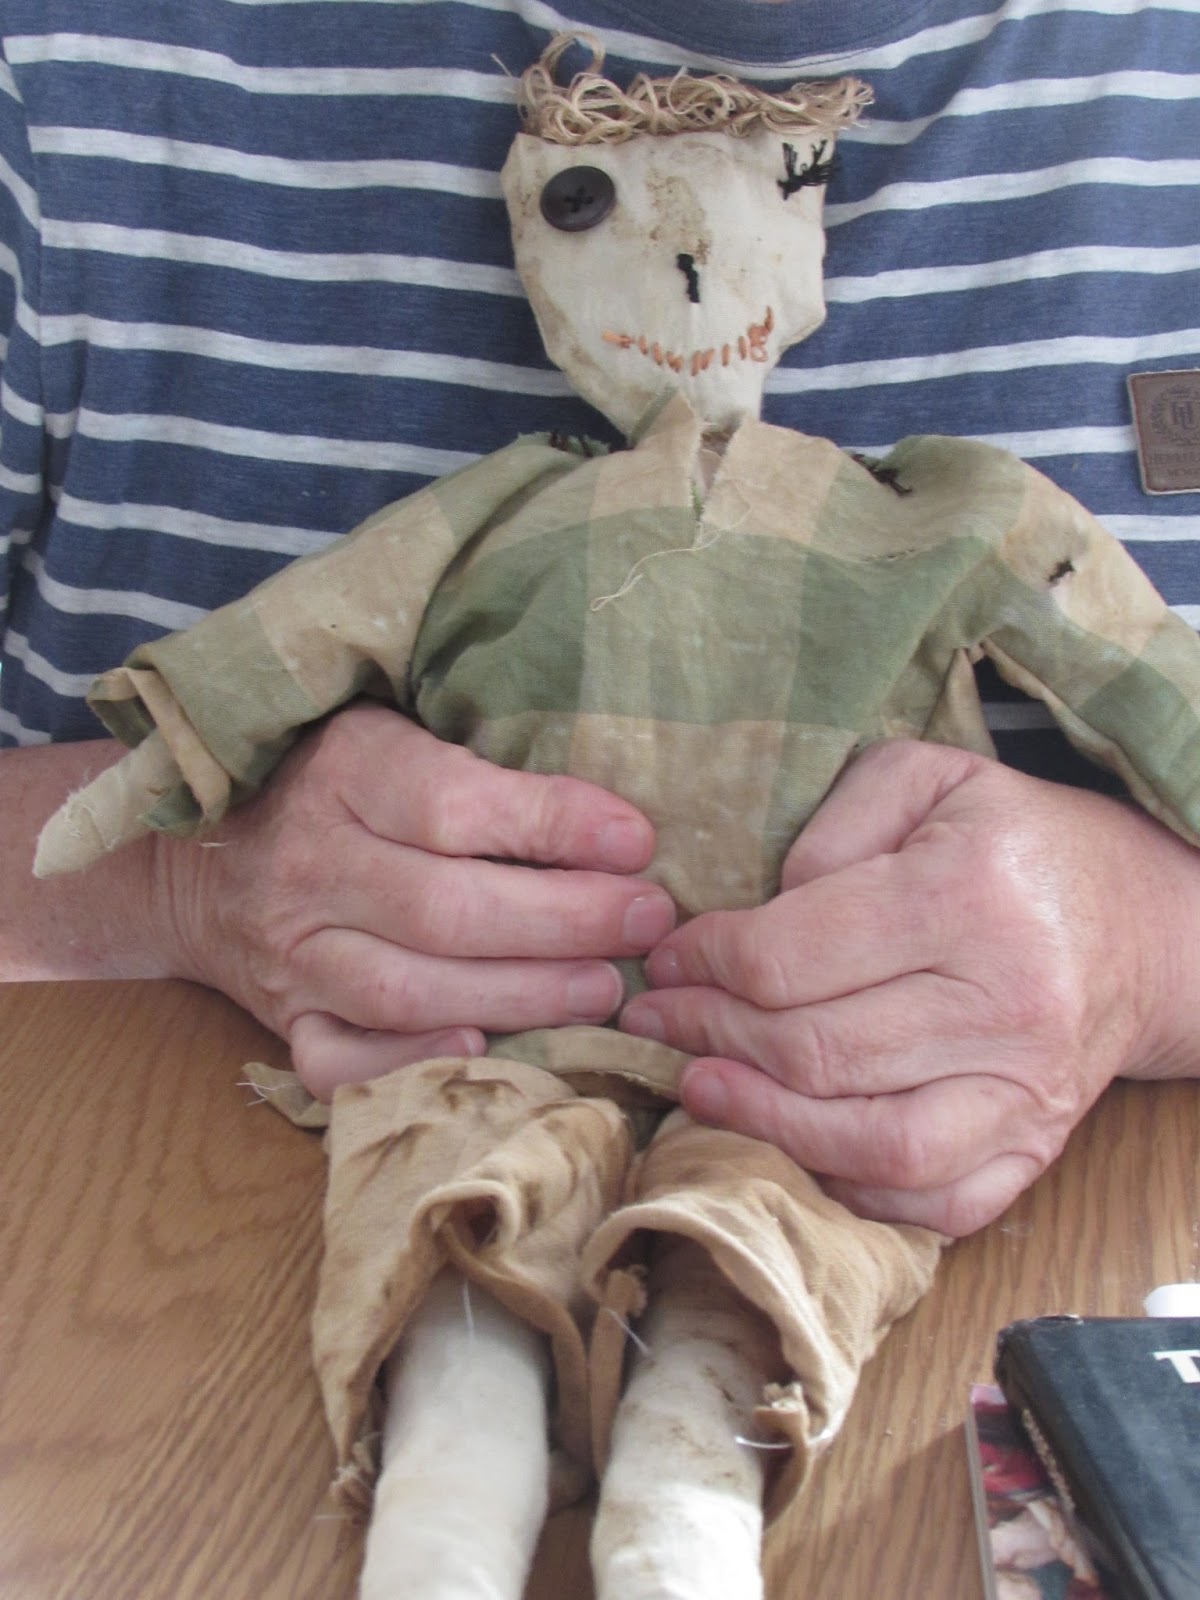
I furiously dyed my way through a whole rag bag in preparation for this, and although I came out with pink-stained hands and frizzy hair smelling like coffee, I think it was well worth it. All of Barney; his body, his hair, his clothes, the stuffing, is made from rags and hand dyed materials.


He was actually supposed to have two eyes, but I got very overexcited and managed to break off a needle in his head when stitching the second button on, so I had to leave it as was with bits of black thread hanging out. Mum loves it, thinks it looks "folk".


With his full outfit; tunic, trousers and a bakers' apron (which was actually a cloth that I mopped up a spilled puddle of coffee with during the dyeing process, and discovered I loved it. So I added some jam as well, just to complete the look). I absolutely enjoyed making this doll so much, and it was so quick and easy because I wasn't worried about perfection.


Barney and the book by Barb!

Getting Berried Away

During last weeks dyeing marathon, I got very carried away with the home made colours and decided to berry dye a piece of fabric I had laid out ready for the coffee treatment.


The harvest is already done, but there are still some late fruit and low hanging bits that I was able to scrounge out of the garden. First, blackcurrants:


Then a few Loganberries:


A number of Raspberries:


 And a whole bunch of Redcurrants:


After picking a good two handfuls of fruit, I folded them into the fabric....


and SQUASHED!


I squashed and squashed until my hands were also stained pink and purple. I liked how there were different colour variations all the way through from the different berries.


After baking, it turned out a pretty graduated pink!


With my other dyed pieces, ready to be made into something....

Cup of Tea or Coffee?

After talking to the lovely ladies down in Hastings, and receiving a book as a birthday present just on the very topic, I set out today to do a little dyeing.


I started with a pan of hot water, which I brought to the boil before adding a metric tonne of coffee (I didn't measure it and got a little carried away). At the same time, I had a smaller pot which I filled with loose leaf herbal tea and boiling water.


I had absolutely no idea how any of it was going to turn out, which was so exciting! It reminded me of doing science experiments, or making "potions" as a child out of leaves and flowers in the garden. I lived a very sheltered childhood.


Raided the cloth drawer for a bunch of old rags, and cut up a few bits of plain fabric to go in too.
Adding the fabric to the bubbling pot felt so wrong, like I was going to pull it out and have it covered in dinner or something.


But in they went.


To continue with the theme of experimentation, I did a little ad-hoc tye-dyeing with some thick cotton thread I had lying around. I was excited to see if the thread kept all the dye out completely, or if it would make any difference at all.


 Adding it to the coffee mixture!


Added another thorough coating of ground coffee because I wanted there to be darker splodges on areas, which worked out very well actually.


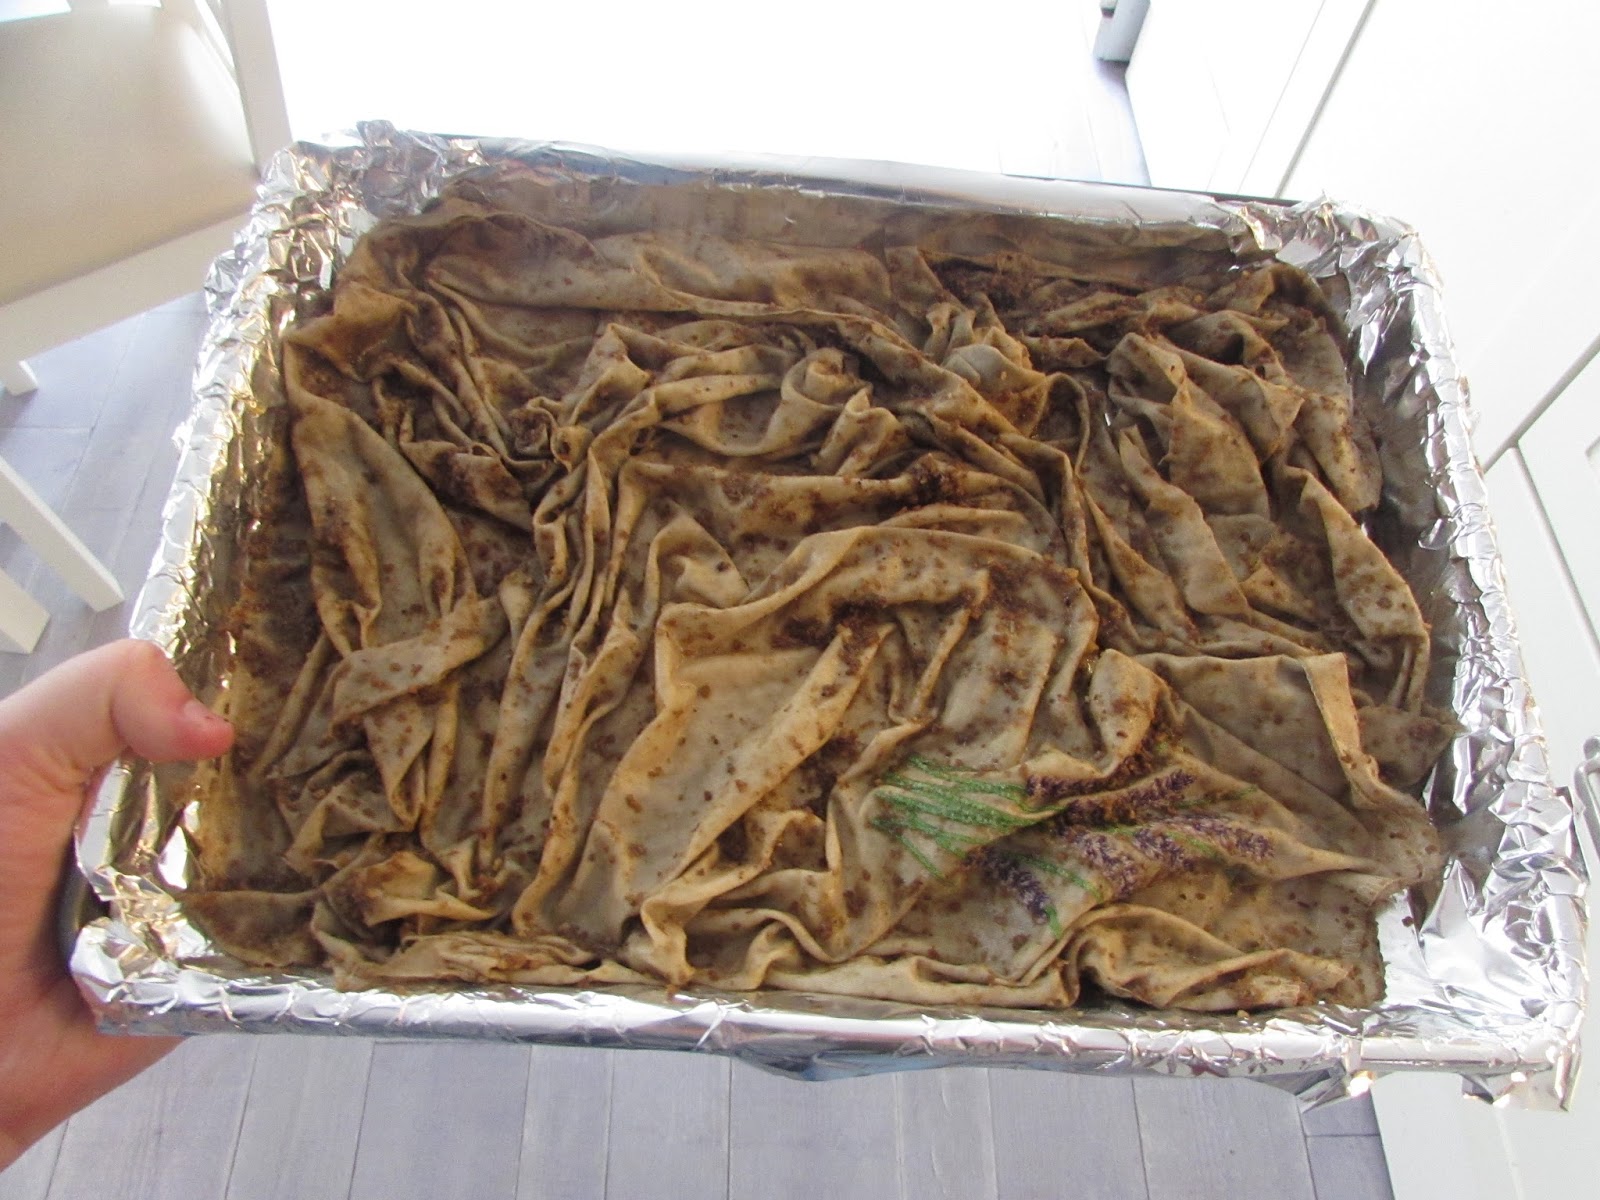
After a good half hour's boiling, I laid the fabric out on tin-foil covered baking trays and baked in the oven. I really regretted not rinsing the tea leaves off this piece first, because they became encrusted on and had to be washed and baked again.


The Aga is full of fabric and covered in fabric, just the way it should be!


Wait to see what they are going to become......

Monday, 10 August 2015

A Doll Day in Hastings

Today we drove to the seaside for a day in the shade (it would be 'in the sun' but you know what England's like). Hastings is full of amazing little antiques, crafts and charity shops, one of which is displayed below.


After shopping, I decided to take a few snaps of my new dolls (unfinished) because it's not often I get a chance of a different backdrop than my back garden.


This is the witch doll, who has yet to be named (or faced). she has a black silk dress with lace detail and a pair of matching shoes with socks that have red button buckles to match her red button handbag.


This is Jeanette, who has a name obviously, and was the first to be made as part of a long boring day in front of the telly during jet-lag. I have absolutely no idea where any of the fabrics came from for her outfit, but I have been told her top resembles a liberty print. I certainly didn't buy it in Liberty's, more like Age UK!

Below are the dolls on the desk, gives you a better idea of their size.


I also made a little green tweed-esque coat for Jeanette, and I loved working with the thicker fabric; it made it feel much more substantial than cotton, especially the thin cheap stuff I have knocking around.


One last shot of "the girls". This was seconds before the wind took off and blew Jeanette over the side and down a 20 foot drop to the pebbled beach. I had to clamber over the railings and trump down the beach with my skirt blowing all over my face.


Hell, it was worth it. Can't go to the beach without making a bit of a tit out of yourself, I always say. Hopefully I'll get time to put some faces and hair on them, unless I decide I need to do something else instead and call them "replica Amish dolls"!


Fun Day's Family Tutoring!

After more than a month spent living out of a 70L backpack in the wastes of Asia (or gorgeous rural Thailand, whichever) it was so nice to be back and surrounded by gorgeous fabrics again. Not that I didn't pick up any gorgeousness abroad, oh no sir, but that will have to wait.

My lovely little cousin came over for her first "lesson" into sewing with me and my mum, but since the upstairs room isn't going to paint itself, the job fell to me. I was pleased as punch though, I mean, having a whole day to just sew and play with buttons is exactly what I'd hope to be doing anyway!


We only had a short time, and as I didn't want to scare her off from the world of paper-piecing and jelly roll envy, I showed her a starter book and let her pick her favourite project.

So we made felt mice!


My cousin's is called Ketchup, because it resembles a pink ketchup packet.
After finishing the mice, I asked her what she would like to do next, and she showed me her own design for a mouse bed made out of some patchwork piecing and felt sheets. I was very impressed, and they turned out really well!


Look at the sweet macaroon fabric either side of the blue, isn't it just so cute? Well I'm the luckiest because she gave me a large piece of it for my stash! It's great that she has such good taste already, I can show her my favourite fabric haunts...
You'll see something made from those macaroons on here soon, trust me. I smell a doll coming on....

Tuesday, 30 June 2015

Shameless Cake Post Not At All About Craft

Since I'm heading out for a month I thought I'd leave a couple pictures of mouth-watering deserts and treats from Japan....


Doesn't it just make you hungry?!

Craft Classes in Kyoto: Painting Tea Cups

Continuing the run down of a few craft classes I took in Kyoto back in 2013!


Painting tea-cups at Kashogama pottery school was one of the best ones by far. Though of course I say that about all of them....


It's called Fujihira Pottery school, and it is literally five minutes walk from an amazing temple called Kiyomizu-Dera. You can even make your own pottery from scratch on a wheel, or do a painting class where you are provided with all the materials and design books. If you want to have a go, there is also a restaurant and shop nearby where you can buy professionally painted pieces and lie to your family that you made them....

Fujihira tourist site
Japanese language website (use google translate!)
Trip Advisor page

Craft Classes in Kyoto: Painting Dorei Dolls

Possibly the best time of my life was the time I spent in Kyoto, Japan in 2013. Hopefully, with a bit of luck and a bit of finagling I might get to go back... Anyway, whilst in Japan, I dragged my poor unsuspecting boyfriend to do a number of craft activities (most of them traditional Japanese where possible) and I got to experience some wonderful crafts and meet some lovely craftspeople.


Here, at the Kyoto Handicraft Centre, I painted a Dorei doll, which is a small clay doll with a bell in it that sits on a little red pillow. It was such fun! The people there were really helpful and kind, even though I spoke barely any Japanese at all (they speak good English). You can also do many other traditional Japanese handicrafts here; we also did Woodblock Printing on an original woodblock set, but all the photos had people in who might not want to be on the internet.


If you are planning a trip to Kyoto and enjoy trying new things, even if you are completely cack-handed, I really suggest you check this place out! The Website of the Kyoto Handicraft Center

Rules of Quilting that probably shouldn't have been broken

Many a year ago, I had grand plans (as you do) to create a one of a kind quilt project which told the story of a fairytale through innovative new ideas and ways of quilting. The other examples of said project are also posted on here, but I was slightly less embarrassed about those so posted them first.


This is the protagonist of the fairytale story, whom I sketched onto a piece of yellow silky fabric. I then painted her in, and gave her a gold glittery outline because I was feeling particularly tacky that day. What inspired this weird (and slightly pervy) back-angle was the idea of using a new skein of red embroidery thread which, when bought, was tied in a bundle which reminded me of hair so I had to find a way of using it as such.


The perversion doesn't stop there, because you can actually undress the quilt-girl.


She has a blue slip, a blue lacy petticoat and a blue velvet gown. they are only secured on one side, so you can flip through her outfit layers like one of those anatomical model books. I wanted to use as many fun and interesting fabrics as possible, as well as showing her beautiful clothes and give it a tactile element. However it turned out rather voyeuristic and creepy. Still, nothing ventured nothing gained, eh?

Still, 3D and tactility are both something I think could be really interesting to explore in quilts. A story book quilt that a child could read like a bedtime story maybe?
P.S. Off for a brief sojourn in Asia so there won't be any updates until August!

Wednesday, 10 June 2015

Altered Book Tutorial

I just want to begin by saying I was really, really unhappy with how the finished product turned out. It wasn't at all what I expected, or wanted, or anything; but I promised an altered book tutorial, and this has an unusual spin on it with multiple layers. 


Begin with a book of your choosing. It is very popular to use old books, antique books or specialty books with beautiful pages to work from, but there is no reason you can't use an ordinary paperback or your favourite well-worn novel!


To get the layered look, I separated the book into three sections, and secured it with bulldog clips. If you want to have a one-layer altered book, clip the paper together with a larger clip or a large peg.


Apply glue (PVA or another paper/woodworking glue) to the edges of the book sections (or section, if you have it clipped in one large section). Apply the glue thickly with an old paintbrush, making sure to try and brush as many pages as possible. Don't do what I did, which is paint the entire layer THEN bulldog clip it, because I ended up sticking those to my book as well and having to rip them out. Paint glue AROUND the clips, then go back when they are dry and paint the spaces.


Once the glue is dry, take a craft knife and carefully cut a rectangle (or any shape!) out of the pages. Your pages should be glued together in a large paper book lump, so they should be far easier to cut because there is less movement. Once you have cut all the way through the layers, apply a thick layer of glue to the inside edges to the paper cut outs.


For the layered look, I had three segments to work with, so I arranged a number of pre-cut flower images along the bottom and sides of the paper, sandwiched between the layers. Once you are happy with the layout, glue the pictures in place. A good tip is to cut your pictures a little longer on the bottom than you want to have showing, to have space to glue to the paper.


Once the glue is applied, hold in place with clips or mismatched pegs until dry.


I had some fun with this book afterwards, but haven't taken a photo of the finished look because I'm still really unhappy with it. Just thought I'd show you the step-by-step, so you can have a go!